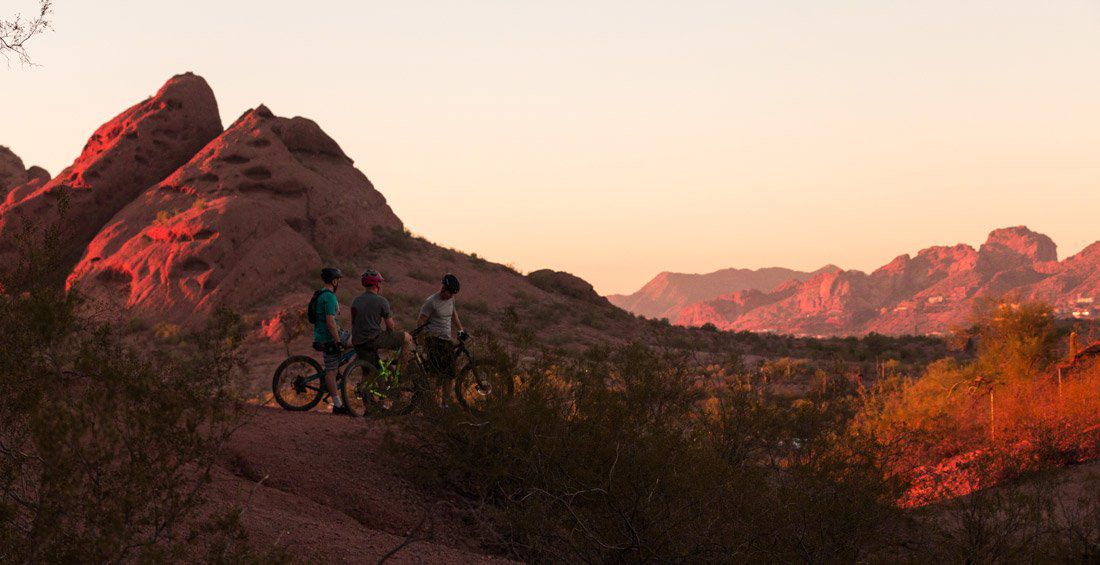
HOW TO CHOOSE THE BEST MOUNTAIN BIKE GEAR
You’ve spent a lot of time testing different bikes, finally deciding on one that suits your riding style and experience level. It’s specced out with a sturdy suspension and griptacular tires and you either opted for stiff 29ers designed to smash summer trails or plus-size rollers optimized for snowy singletracks. But before you go out and have your front tire start flinging debris your way, use this gear guide on how to choose mountain bike gear that’s ready for the same conditions as your bike.
How to Choose a Bike Helmet

1. Determine The Level Of Protection You Need
There are two primary types of mountain bike helmets: full-face and half-shell. As the name implies, full-face styles protect your cheeks and chin as well as your grey matter. This style is most often used by enduro riders, BMX bikers and aggressive downhillers. Half-shell styles are typically used by everyone else, from recreational riders to cross-country racers and bike commuters. Regardless of your riding style, the primary purpose of a bike helmet is to prevent skull fractures and brain injuries. All helmets sold in the United States must meet mandatory safety standards, but there are voluntary standards to consider as well. The helmet you choose should be equipped with a rotational impact protection system of some sort. MIPS is currently the most common, though many manufacturers have developed and patented their own equally effective technologies in recent years.

2. Find The Proper Fit
Helmet sizes are measured in centimeters. Wrap a soft tape measure around your head, just above your eyebrows, to determine the diameter of your dome (or use a string and then place it on a rigid ruler). The measurement should fall within the range on the manufacturer’s size chart. Your mountain bike helmet should fit firmly and securely without feeling too tight, and remain level when the chin strap is fastened. If it moves from side to side or from front to back, do not add extra padding to achieve a better fit; this may prohibit its performance. Instead, select a smaller size or try a different manufacturer. Look for models with a dial adjustment on the back of the helmet to get the most comfortable fit. This is especially important if you sometimes wear a cycling cap under your helmet or often style your hair differently—curly coifs take up more room than straight styles.

3. Select Features Based On Your Personal Needs
Some of the most popular features found on bike helmets include adjustable visors, goggle clips, comfort pads, and ponytail ports. But that doesn’t mean a bald guy needs the latter. Think about your riding style and filter features accordingly. If you plan to ride in low-light conditions, for instance, you may want to purchase a helmet with a light mount. Many mounts can also be used with a camera if that’s your jam. Multiple vents are a must in any weather. You’ll want more ventilation for hot rides, but even if you are biking in cool temps, your head heats up quickly on steep climbs and appreciates the airflow.

4. Show Your Lid Some Love To Make It Last Longer
Your helmet is inevitably going to get dirty and sweaty, but it doesn’t have to stay that way. Wipe its shell down with warm, soapy water after each ride and wash the removable pads according to manufacturer guidelines. Store it in a cool, dry place—excessive heat (like the hot air in a car trunk) degrades the material quickly and reduces its life. With proper care, most helmets last about 5 years. You should replace your helmet sooner, however, if you’ve crashed hard and it hit the ground. It’s also time to purchase a new lid when you notice cracks in the shell, marks on the liner, worn straps, or missing parts.
How to Choose Body Armor for Mountain Biking
When trying to find the best mountain bike gear, it’s not just your head that’s vulnerable if you crash—your entire body is at risk. Body armor can be worn to lessen the impact and prevent injuries to your knees, shoulders, chest, and spine. You don’t necessarily need to suit up for every ride, however. Wearing body armor is a highly personal choice dependent on your mental approach, skill level, and riding style, as well as the type of terrain you’re riding on and the length of the trail.

1. Hard Shell Or Soft Shell Body Armor?
Mountain bike armor combines a breathable fabric garment—whether a shirt, a vest, a compression short, or a pant—with either a hard shell or a softshell. Hard shells are typically made from polycarbonate and are best suited for dirt jumping or gravity rides on techy terrain, while soft shells use foam padding for protection on moderate trail rides. Although hard shells offer more assurance, they can feel heavy on a long spin and/or restrict movement. So choose carefully between comfort and protection. If you’ve never ridden a particular trail before or your confidence is shaky from a crash (we’ve all been there!), it’s usually a good idea to err on the side of caution when selecting armor.

2. Protect Your Limbs As Well As Your Core
Experienced riders often choose to only wear knee pads, while those new to the sport may want to protect their elbows and shins too. Whatever combo you prefer, sizing is critical. If the fit is too snug, the padding can hinder pedaling or cause poor blood flow. Too loose and the padding might slip off in a crash. For comfort, many riders choose to keep knee pads in their pack during uphill climbs and put them on just before that hard-earned downhill stretch; look for styles that are easy to take on and off without removing your shoes. For the knee, elbow, and shin protectors alike, the material should be breathable, fit the shape of your arms or legs, and feel comfortable against your skin. And, like all-mountain bike gear, armor gets salty and dirty. Removable protectors make it possible to toss the garment in the washing machine instead of laundering it by hand..
Choosing the Best Mountain Biking Accessories and Apparel

1. Get A Grip With Full-Fingered Gloves
Mountain bike gloves have more padding and finger coverage than road cycling gloves. While fingerless gloves may be more appealing on a sweltering summer day, they don’t offer the same level of protection from branches and brambles along the trail. This doesn’t mean your palms are going to be saturated with sweat, however. There are styles designed for warm weather made from moisture-wicking material with plenty of ventilation. For cool weather rides, look for styles that are wind- and water-resistant with longer cuffs. Functional features for any season include silicone strips for grip on gear shifters and brake levers, touchscreen-compatible fingertips and knuckle guards. On longer rides, you may want gloves with thick padding or gel in the palm to prevent numbness. But when making a steep descent, many bikers prefer gloves without additional material on the palm for better bar feel and control.

2. Mountain Bike Packs To Shuttle Your Gear
Mountain biking backpacks fit similarly to hiking daypacks, hugging your body and using the adjustable shoulder, chest, and waist straps. Padding and venting on the straps make for a more comfortable carry. The capacity you select depends on the length of your ride, but a 15- or 20-liter bag with a 2- or 3-liter hydration reservoir usually offers enough room to carry enough water, food, and other essentials like tools and tubes for trailside repairs, a first aid kit, a lightweight jacket, and protective gear. Compression straps are a must to prevent your load from bouncing over bumps or throwing off your balance on tight turns. Some bike-specific backpacks have integrated back protectors that eliminate the need for an additional layer of body armor, which is a nice feature. Helmet holders are also handy. If you want to travel a little lighter or save your back from sweat, lumbar packs are another option.

3. Jerseys That Do Justice On The Trail
If you plan to wear a mountain biking pack, a moisture-wicking jersey is a must to keep the sweat off your back. Shop for shirts with flat or offset shoulder seams to prevent uncomfortable pressure points under the straps. For short, packless rides, jerseys with side zip pockets and/or rear drop-in pockets conveniently keep a repair kit, a soft flask, and your phone within reach. Other features to consider include underarm panels and front closures (zips, buttons, or snaps) for ventilation. Droptail hems are also desirable so you don’t expose any unwanted skin as you lean over the handlebars. You may also want to wear long sleeves—even in warm weather—as they can save your skin from crash rash and offer protection from the sun too.

4. The Bottom Line On Shorts And Pants
The beauty of mountain biking bottoms is you have a much wider selection than you do with cycling gear. Styles run the gamut from padded tights designed for cold weather to baggie shorts for hotter temps. Many MTB pants on the market even mimic the look of jeans and other streetwear but are designed with sport-specific features like reflective tape within the drive-side cuff. Whether the climate dictates shorts or pants, look for styles made from a stretchy, abrasion-resistant material with a high back waist and a gusseted crotch. The more aggressive your ride, the thicker the fabric should be. If your bike bottoms don’t have integrated padding, consider wearing a chamois or bib underneath for added comfort and muscle support.
Get Your New Mountain Bike Gear Today
If you are looking for the best gear for your next mountain biking trip, look no further. Check out Gear.com’s hand-curated selection of the best mountain bike helmets, body armor, apparel and accessories.



Leave a comment
This site is protected by hCaptcha and the hCaptcha Privacy Policy and Terms of Service apply.